LeEdgelord (talk | contribs) No edit summary Tag: Visual edit |
(clean up, typos fixed: world wide → worldwide, the the → the) |
||
| (23 intermediate revisions by 11 users not shown) | |||
| Line 1: | Line 1: | ||
| + | {{Infobox Nation |
||
| − | he '''Battle of the Denmark Strait''' was a naval engagement on 24 May 1941 in the Second World War, between ships of the Royal Navy and the German ''Kriegsmarine''. The British battleship HMS ''Prince of Wales'' and the battlecruiser HMS ''Hood'' fought the German battleship ''Bismarck'' and the heavy cruiser ''Prinz Eugen'', which were attempting to break out into the North Atlantic to attack Allied merchant shipping (Operation Rheinübung). |
||
| + | | name = Japan |
||
| + | | flag = Japanflag.jpg |
||
| + | | map = |
||
| + | | government type = {{wp|Unitary Parliamentary Democracy}} |
||
| + | | title = {{wp|Prime Minister}} |
||
| + | | state head = [[Genbu Kururugi]] (Former)<br>[[Kaname Ohgi]] (Current)<br>[[Kaguya Sumeragi]] (Manga Only) |
||
| + | | capital = [[Tokyo Settlement]] |
||
| + | | area = |
||
| + | | population = 89 million (prior to [[Invasion of Japan|invasion]]) |
||
| + | | anthem = |
||
| + | | realworld = {{wp|Japan}} |
||
| + | | other = See [[United Federation of Nations]] |
||
| + | }}The '''United States of Japan''', known as '''Area 11''' during [[Britannian]] rule and formerly known as '''Japan''', serves as the primary setting of ''Code Geass'' media. Presumably, most of Japan's history in the world of ''Code Geass'' diverges little from that of our world. |
||
| + | ==History== |
||
| − | Fewer than 10 minutes after the British opened fire, a shell from ''Bismarck'' struck ''Hood'' near her aft ammunition magazines. Soon afterwards, ''Hood'' exploded and sank within three minutes, with the loss of all but three of her crew. ''Prince of Wales ''continued to exchange fire with ''Bismarck'' but suffered serious malfunctions in her main armament. The British battleship had only just been completed in late March 1941, and used new quad-barrel guns that were unreliable. Therefore, the ''Prince of Wales'' soon broke off the engagement. The battle was considered a tactical victory for the Germans but its impact was short-lived; the damage done to ''Bismarck's'' forward fuel tanks forced the abandonment of the breakout and an attempt to escape to dry dock facilities in occupied France, producing an operational victory for the British.<sup>[1]</sup> Incensed by the loss of ''Hood'', a large British force pursued and sank ''Bismarck'' three days later. |
||
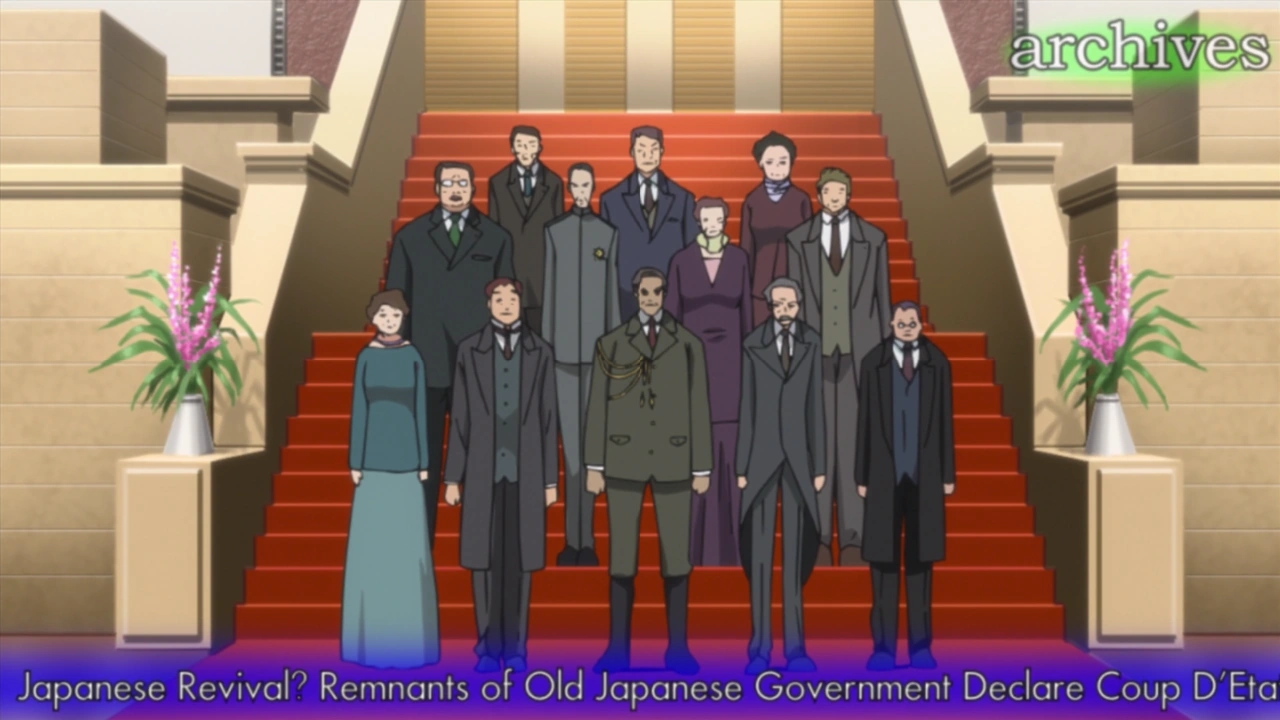
| + | [[File:Former Kururugi Administration.png|thumb|Former Kururugi Administration.]]Prior to its [[Invasion of Japan|invasion]] and conquest by the [[Holy Britannian Empire|Holy Britannian Empire]], Japan used the real-world ''Hinomaru'' flag and operated under a system of parliament, having become a democracy after the [[World History|First Pacific War]]. |
||
| + | Japan was the world's largest supplier of [[Sakuradite]], a rare mineral which was highly valued as a superconductor. Producing 70% of it worldwide, Japan used this resource to manipulate the balance of power between the three dominant powers to remain an independent and neutral nation. It was believed that if any of the superpowers invaded Japan for its Sakuradite, the other two would be forced to attack on Japan's behalf or otherwise risk annihilation. During what became known as the Oriental Incident, Japan aligned its policies with the Chinese Federation and Europa United against Britannia as Britannia continued to make increasingly aggressive advances in the Pacific theater. |
||
| + | On August 10 in the year 2010 of the Imperial Calendar, the Second Pacific War erupted and Britannia easily overwhelmed Japan's comparatively outdated defenses with their new humanoid autonomous armored knights known as the [[Knightmare Frames]] in only a month. Following its conquest, Japan was renamed "Area 11" and its people "Elevens." Britannia quickly began building colonies and mines on the islands, recruiting former Japanese as "[[Honorary Britannians]]" while those who refused to join Britannia lived in poverty in the ghettos or joined the various resistance movements. Though Japan was defeated, it wasn't broken as Japan's government surrendered before the Japanese military had been fully destroyed, leading to the creation of the [[Japanese Liberation Front]] and other resistance movements that persisted for years, culminating in the [[Black Knights]]. |
||
| − | The two German ships were expected to sail westward and break through the Greenland-Iceland-UK (GIUK) gap. While passing neutral Sweden in the Baltic Sea, the ships were spotted and reported by the Swedish cruiser ''Gotland'' and patrol planes;<sup>[2]</sup> these reports were intercepted by the British embassy, allowing Royal Navy ships to watch their probable route. Due to cloud and rain, aircraft scheduled to assist in the search could not do so when the German ships attempted their breakout.<sup>[3]</sup> |
||
| + | The resistance of Japan, which Lelouch mentions is stronger than in any other part of the empire, owes its presence in part to the sudden death of Genbu Kururugi, Japan's last prime minister before it was conquered. The official statement announced that the prime minister committed suicide in the face of Britannia's overwhelming forces, when, in actuality, he was prepared to stage a ''do-or-die'' resistance against Britannia, even if it meant the extinction of the Japanese people. This compelled his son, [[Suzaku Kururugi]], to murder him in the hopes that fewer lives would be lost. |
||
| − | On the evening of 23 May, despite the advantage of inclement weather to cloak the German's presence, the two ships were spotted steaming at 27 kn (31 mph; 50 km/h), by the British heavy cruisers HMS ''Norfolk'' and ''Suffolk''. These cruisers—each carrying eight 8-inch guns—were patrolling the Denmark Strait under the command of Rear-Admiral Frederic Wake-Walker. With the help of ''Suffolk''<nowiki/>'s newly installed radar the cruisers shadowed the German ships, reporting on their movements throughout the night. |
||
| + | === Britannian Occupation and Formation of United States of Japan === |
||
| − | The next morning, at the exit to the Strait between Iceland and Greenland a force of eight British ships was in place, to intercept the Germans. The British fleet included the battleship ''Prince of Wales'', the battlecruiser HMS ''Hood'' and a screen of six destroyers, <sup>[nb 1]</sup> under the command of Vice-Admiral Lancelot Holland in ''Hood''. |
||
| + | Following the failed [[Black Rebellion|First Black Rebellion]], Area 11 was designated a "correctional area," and particularly heavy penalties were placed upon Elevens as punishment for their role in the uprising, though even one year later, they still held to hope. Before Zero returned, resistance was active only to heighten oppression during [[Glinda Knights]]' occupation in Area 11 when the Black Knights launched their attack on [[Ashford Academy]]. When Zero finally returned, he declared the creation of the "United States of Japan" and used deception to evacuate one million Japanese, all of them members of the Black Knights, to Horai Island, an artificial island granted to them by the Chinese Federation and worked towards reconquering Japan. |
||
| + | Following the Second Black Rebellion, the Black Knights conducted negotiations with Prince Schneizel, liberating Area 11 in exchange for betraying Zero, who was exposed as Lelouch. After this, Area 11 reclaimed its old name as Japan, and, following Lelouch's death, [[Kaname Ohgi]] became the new prime minister of the United States of Japan. |
||
| − | ''Prince of Wales'' was a newly commissioned ''King George V''-class battleship, similar to ''Bismarck'' in size and power. ''Prince of Wales'' had not yet been properly "shaken down", and her crew was inexperienced. She still had mechanical problems, especially with her main armament. The ship had sailed with shipyard workers still aboard working on her. <sup>[nb 2]</sup> |
||
| + | ==Social Structure During Britannian Control== |
||
| − | For 20 years after her commissioning in 1920, ''Hood'' was the largest and heaviest warship in the world. Combining eight massive BL 15 inch Mk I naval guns with a top speed greater than any battleship on the sea, ''Hood'' was the pride of Great Britain's navy, and embodied the world dominance of British naval power. Despite this, ''Hood'' had one conspicuous flaw as compared to the super-dreadnought battleships she served alongside: as a battlecruiser, much of her bulk was dedicated to extra engine power instead of comprehensive armour coverage.This was in accordance with the prevailing theory originally propounded by First Sea Lord Jackie Fisher that "speed is armour". While her 12-inch belt armour was considered sufficient against most capital ships she was likely to encounter, her 3 inches of deck armour was only rated against shell splinters, leaving her badly unprotected against plunging fire at long range. At the time of her commissioning in World War I, naval gunnery was severely inaccurate at the ranges necessary to produce plunging fire, and ''Hood's''greater speed and maneuverability were rightly seen as an acceptable trade-off. However, as the accuracy of naval gunfire increased in the inter-war period, ''Hood'' was eventually scheduled to receive an upgrade in 1939 that would have doubled her deck armour to 6 inches, but the outbreak of World War II meant the upgrade never took place. She thus sortied to war at a marked disadvantage against the new capital ships of the Axis. |
||
| + | [[File:Trains Between Settlement and Ghetto.png|thumb|One of the distinctions between the Settlement and the Ghetto.]] |
||
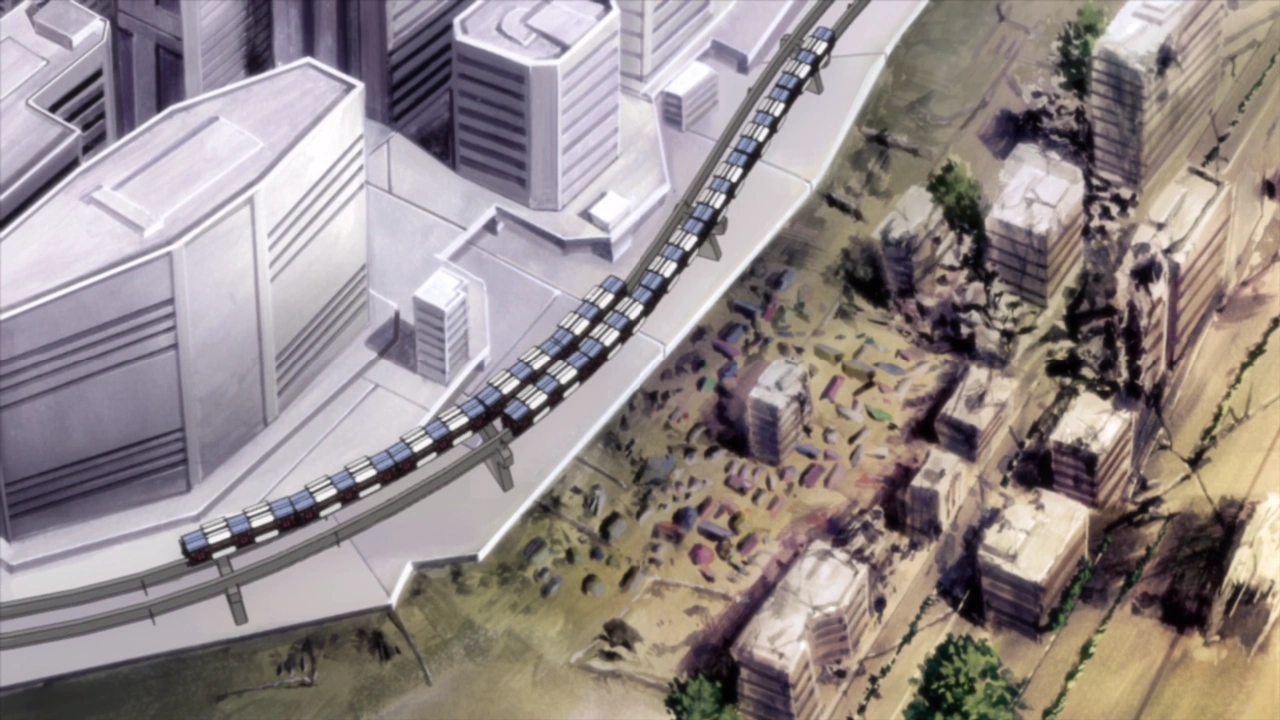
| + | Upon completion of the invasion, Japan was renamed [[Area]] 11, and its population was split into Elevens, [[Honorary Britannians]], and [[Britannians]]. Britannians and Honorary Britannians, supposedly, receive better treatment, special privileges and live in developed areas of [[Tokyo Settlement]], while the underprivileged Elevens (Japanese people) live in the ghettos, such as [[Shinjuku Ghetto]], ruins of old Tokyo. |
||
| + | Many Japanese take the term "Elevens" as being extremely offensive, even reacting violently towards Britannians who use the term; though there are exceptions, as seen in episode '''"'''[[The Abandoned Mask]]'''"''' where few Japanese grunts, working for a Britannian drug dealer, preferred to be called Elevens and had possibly seen it as a compliment. |
||
| − | Aware of ''Hood'''s inadequate protective armour, distant to the southeast of where the battle took place, Vice-Admiral Holland's superior (Admiral Sir John Tovey) deliberated on ordering Vice-Admiral Holland to have ''Prince of Wales'' sail ahead of ''Hood''. With the ships in this position, Admiral Tovey concluded the better-protected ''Prince of Wales'' could draw the German battleships' large-shell gunfire. Ultimately, Admiral Tovey did not give the order, later saying "I did not feel such interference with such a senior officer justified."<sup>[4]</sup> |
||
| + | This system is abolished and their demonym is restored to "Japanese" after their independence. |
||
| − | == Prelude[edit] == |
||
| + | ==Viceroys and Sub Viceroys== |
||
| − | === Plan gone awry[edit] === |
||
| + | [[File:Viceroy Palace.jpg|thumb]] |
||
| − | Last picture of ''Hood'' as a fighting unit, sailing towards her rendezvous with ''Bismarck''. In the foreground three guns from Prince of Wales' 'A' turret can be seen. The guns in the photo appear to be from a triple turret, but untrimmed versions of this photo reveal that it is a quad, with one gun independently elevated to a position and therefore out of view in this rendering. |
||
| + | Throughout the Series, several people (usually of Royalty) have been acting as Viceroys over area 11, as a Viceroy, they hold supreme power over the Area. The position of Sub-Viceroy, despite its connection to the Viceroy, is a ceremonial position with no authority that Cornelia devised to keep Euphemia close. As with most colonies, the currency of Area 11 has the face of its viceroy. |
||
| + | [[File:Britannia - Area 11 Currency.png|thumb|Prince Clovis on Currency]] |
||
| − | The original track chart of HMS ''Prince of Wales'' for the battle of the Denmark Strait (click to enlarge). Note the manuscript additions |
||
| + | ===List of Viceroys of Area 11=== |
||
| − | Vice-Admiral Holland's battle plan was to have ''Hood'' and ''Prince of Wales'' engage ''Bismarck'' while ''Suffolk'' and ''Norfolk'' engaged ''Prinz Eugen''(which, Holland assumed, still steamed behind ''Bismarck'' and not ahead of her). He signalled this to Captain John C. Leach of ''Prince of Wales''<sup>[5]</sup> but did not radio Rear Admiral Wake-Walker, who as Commander of the 1st Cruiser Squadron directed ''Suffolk'' and ''Norfolk'', for fear of disclosing his location. Instead, he observed radio silence. Holland hoped to meet the enemy at approximately 02:00. Sunset in this latitude was at 01:51 (ship's clocks were four hours ahead of local time<sup>[6]</sup>). ''Bismarck'' and ''Prinz Eugen'' would be silhouetted against the sun's afterglow while ''Hood'' and ''Prince of Wales'' could approach rapidly, unseen in the darkness, to a range close enough not to endanger ''Hood''with plunging fire from ''Bismarck''.<sup>[7]</sup> The Germans would not expect an attack from this quarter, giving the British the advantage of surprise. |
||
| + | # '''[[Clovis la Britannia|Prince Clovis la Britannia]]''' (Deceased; Assassinated by [[Zero]]). |
||
| + | # '''[[Cornelia li Britannia|Princess Cornelia li Britannia]]''' (Resigned) |
||
| + | ## '''[[Euphemia li Britannia]]''', as Sub-Viceroy. (Deceased; Assassinated by [[Zero]]). |
||
| + | # '''[[Calares]]''' (Deceased; Assassinated by [[Zero]]). |
||
| + | # '''[[Nunnally vi Britannia|Princess Nunnally vi Britannia]]''' (Became 100th Empress). |
||
| + | {{-}} |
||
| − | The plan's success depended on ''Suffolk''<nowiki/>'s continually unbroken contact with the German ships. However, ''Suffolk'' lost contact from 00:28. For 90 minutes, Holland neither sighted the German ships nor received any further news from ''Norfolk'' or ''Suffolk''. Reluctantly, Holland ordered ''Hood'' and ''Prince of Wales'' to turn south-southwest but he detached his destroyers which continued searching to the north.<sup>[8]</sup> |
||
| + | ==Notable Locations== |
||
| − | Before contact was re-established, the two squadrons missed each other narrowly. Had the German ships not altered course to the west at 01:41 to follow the line of the Greenland icepack, the British would have intercepted them much earlier than they did. The British destroyers were just 10 mi (8.7 nmi; 16 km) to the southeast when the Germans made this course change. If the visibility had not been reduced to 3–5 mi (2.6–4.3 nmi; 4.8–8.0 km), the German vessels would probably have been spotted (since generally on a calm, clear day ship lookouts can observe large objects and ships about 12 miles (19 km) distant on the horizon. And if the ship's lookouts are in a crow's nest, the observable distance is even further).<sup>[9]</sup> |
||
| + | ===Fuji Administrative District=== |
||
| + | [[Image:Mt. Fuji.jpg|thumb|200px|left|Mt. Fuji.]] |
||
| + | The '''Fuji Administrative District''' is the site of a major [[Sakuradite]] mining operation carried out under the direct authority of the [[List of Code Geass characters#Ky.C5.8Dto House|NAC]]. In 2017, it was the setting of the first proposed [[Special Administrative Zone of Japan]] and the massacre that ensued during the founding ceremony. A memorial called the '''Fuji Mausoleum''' was built on site in the year following, commemorating those who died. The location is also known as '''Sector F-208'''. During a battle between [[Lelouch]] and [[Schneizel]], Lelouch detonated the [[Sakuradite]] mines within Mt. Fuji, causing an explosion that destroyed a majority of the [[Black Knights]]' forces as well as his own ground forces. |
||
| + | {{-}} |
||
| − | Just before 03:00, ''Suffolk'' regained contact with ''Bismarck''. ''Hood'' and ''Prince of Wales'' were 35 mi (30 nmi; 56 km) away, slightly ahead of the Germans. Holland signaled to steer toward the Germans and increased speed to 28 kn (32 mph; 52 km/h). ''Suffolk''<nowiki/>'s loss of contact had placed the British at a disadvantage. Instead of the swiftly closing head-on approach Holland had envisioned, he would have to converge at a wider angle, much more slowly. This would leave ''Hood'' vulnerable to ''Bismarck''<nowiki/>'s plunging shells for a much longer period. The situation worsened further when, at 03:20, ''Suffolk'' reported that the Germans had made a further course alteration to the west, placing the German and British squadrons almost abeam of each other. |
||
| + | ===Kamine Island=== |
||
| − | At 05:35, lookouts on ''Prince of Wales'' spotted the German ships 17 mi (15 nmi; 27 km) away. The Germans, already alerted to the British presence through their hydrophonic equipment, picked up the smoke and masts of the British ships 10 minutes later. At this point, Holland had the option of joining ''Suffolk'' in shadowing ''Bismarck'' and waiting for Tovey to arrive with ''King George V'' and other ships to attack or to order his squadron into action. He chose the latter at 05:37.<sup>[10]</sup> The rough seas in the Strait kept the destroyers' role to a minimum and the cruisers ''Norfolk'' and ''Suffolk'' would be too far behind the German force to reach the battle. |
||
| + | [[Image:Kamine Island.JPG|thumb|200px|thumb]] |
||
| + | '''Kamine Island''' (神根島, "Kaminejima") is an uninhabited island in Area 11, near the real-world island of Shikinejima, claimed by Clovis prior to his death. It is a few miles from [[Shikine Island]]. A [[Thought Elevator]] is located here within the ruins of a structure built by an as yet unidentified civilization. This civilization appears to be somehow related to the origin of [[C.C.]] and [[V.V.]], and the existence of [[Geass]]. In 2018, after connecting all the Thought Elevators, the [[Emperor]] of [[Britannia]] intends to unleash Ragnarök using the Thought Elevator located there. |
||
| + | {{-}} |
||
| − | == Battle[edit] == |
||
| − | === |
+ | ===Shikine Island=== |
| + | [[Image:Shikine Island Base.png|200px|thumb|right|Shikine Island Base]] |
||
| − | ''Hood'' opened fire at 05:52 at a distance of approximately 26,500 yd (24,200 m). Holland had ordered firing to commence on the leading ship, ''Prinz Eugen'', believing from her position that she was ''Bismarck''. Holland soon amended his order and directed both ships to engage the rear ship, ''Bismarck''. ''Prince of Wales'' had already identified and engaged ''Bismarck'', whereas ''Hood'' is believed to have continued to fire at ''Prinz Eugen'' for some time. |
||
| + | '''Shikine Island''' (Shikinejima) is the site of a Britannian military facility, which hosts the airstrip used by Prince [[Schneizel El Britannia]]'s [[Avalon]] upon its initial arrival in Area 11. This was originally the site of a meeting between Princess [[Euphemia Li Britannia]] and a V.I.P. (who is later revealed to be Schneizel), however this was interrupted due to an attack by the [[Black Knights]]. The commander of the facility is Lieutenant Colonel Fayer (ファイエル中佐). |
||
| + | {{-}} |
||
| − | Holland was a gunnery expert, was well aware of the danger posed by ''Hood''<nowiki/>'s weak horizontal protection and wanted to reduce the range as quickly as possible. At a shorter range, the trajectory of ''Bismarck''<nowiki/>'s shells would be flatter and they would be more likely to hit the sides of the ship rather than the deck or to glance off the top deck. Holland closed the range at an angle that placed the German ships too far forward of the beam, which meant that only 10 of the 18 British heavy guns could train and presented the Germans with a bigger target than necessary. One of ''Prince of Wales''<nowiki/>' forward guns became unserviceable after the first salvo, leaving only 9 still firing.<sup>[11]</sup> ''Suffolk'' and ''Norfolk'' tried to engage ''Bismarck'' during the action but both were out of range and an insufficient speed advantage over ''Bismarck''rapidly to close the range.<sup>[12][13]</sup> |
||
| + | ===Kyushu Block=== |
||
| − | The Germans also had the weather gauge, meaning that the British ships were steaming into the wind, spray drenching the lenses of ''Prince of Wales'' "A" turret's 42 ft (13 m) Barr and Stroud coincidence rangefinder and both British ships' "B" turret 30 ft (9.1 m) rangefinders.<sup>[nb 3]</sup> The shorter based (15 ft (4.6 m)) ones in the director towers had to be used instead. Holland had ''Prince of Wales'' stay close to ''Hood'', conforming to ''Hood''<nowiki/>'s movements instead of varying course and speed, which made it easier for the Germans to find the range to both British ships. It would have aided Holland's gunners if they had both fired upon ''Bismarck'' as originally planned, since they could time precisely each other's salvos to avoid mistaking one ship's fire for the other. The British could also use ''Concentration Fire'', where both ships' main armament salvos would be controlled by one ship's fire control computer—probably ''Prince of Wales''<nowiki/>' modern Admiralty Fire Control Table. |
||
| + | ===Lake Kawaguchi=== |
||
| + | [[Image:Codegeass0810LG.jpg|thumb|200px|right|Lake Kawaguchi Convention Centre hotel]] |
||
| + | '''Lake Kawaguchi''' is a famous Britannian tourist spot, and is the site of the '''Annual Summit of the Sakuradite Producing Countries'''. It is the setting of a [[Japanese Liberation Front Hotel Incident|hostage incident]] instigated by a branch of the [[Japan Liberation Front]] under the leadership of a man named [[Josui Kusakabe]]. The incident is resolved by the combined efforts of [[Cornelia]] and the [[Black Knights]]. |
||
| + | {{-}} |
||
| − | ''Prince of Wales'' struck her target first. She would ultimately hit ''Bismarck'' three times. One shell struck the commander's boat and put the seaplane catapult amidships out of action (the latter damage not being discovered until much later, during an attempt to fly off the ship's War Diary on the eve of her final battle). The second shell passed through the bow from one side to the other without exploding. The third struck the hull underwater and burst inside the ship, flooding a generator room and damaging the bulkhead to an adjoining boiler room, partially flooding it. The last two hits caused damage to ''Bismarck''<nowiki/>'s machinery and medium flooding.<sup>[14]</sup> The hit also severed a steam line and wounded five of ''Bismarck'''s crew by scalding.<sup>[15][16][17]</sup> The damage to the bow cut access to 1,000 long tons (1,000 t) of fuel oil in the forward fuel tanks, caused ''Bismarck'' to leave am oil slick and reduced her speed by 2 kn (2.3 mph; 3.7 km/h). ''Bismarck'' was soon listing 9° to port and lost 2 m (6.6 ft) of freeboard at her bow.<sup>[14]</sup> |
||
| + | ===Narita=== |
||
| + | [[Image:Narita Memorial.jpg|thumb|200px|right|Narita Memorial.]] |
||
| + | The '''Narita Mountains''' are a mountainous region originally occupied by the [[Japan Liberation Front]] as a major base. It is the site of an [[Battle for Narita|armed skirmish]] between [[Cornelia]] and the Front, interrupted by the [[Black Knights]] soil liquefying the mountainside with disturbed groundwater. The resulting landslide wipes out a fair portion of both Cornelia's forces and the Front's, and also damages the small settlement of '''Narita''' downhill, killing many civilians. Among the dead is [[Shirley]]'s father, [[Joseph Fenette]], a Britannian public official who was surveying the region for veins of [[Sakuradite]]; in the novels, he is said to be an associate of General Bartley. A memorial to the [[Holy Empire of Britannia#Demographics|Britannian]] citizens who lost their lives in the incident was later built in the area. One of the laboratories of the Rosenberg Institute used by Bartley to research [[C.C.]] was situated in the town until the above events forced a relocation. Neither the settlement nor the mountain range by the same name bear any relationship with the actual Narita City. |
||
| + | [[File:Narita Mountains.png|thumb|200px|The Narita Mountains.]] |
||
| + | {{-}} |
||
| − | A modern reconstruction showing a 14-inch shell from HMS ''Prince of Wales'' penetrating ''Bismarck''<nowiki/>'s bow |
||
| + | ===Saitama Ghetto=== |
||
| − | The Germans held their fire until 05:55, when both German ships fired on ''Hood''. Admiral Lütjens, the German fleet chief and task force commander, did not immediately give the order to commence firing. Not until he had made multiple inquiries did ''Bismarck''<nowiki/>'s first gunnery officer ''Korvettenkapitän'' Adalbert Schneider, "''Frage Feuererlaubnis''"? (Permission to open fire?); the commander of ''Bismarck,'' ''Kapitän zur See'' Ernst Lindemann, impatiently responded: "''Ich lasse mir doch nicht mein Schiff unter dem Arsch wegschießen. Feuererlaubnis!''" (I'm not letting my ship get shot out from under my arse. Open fire!) <sup>[18]</sup> A shell hit ''Hood''<nowiki/>'s boat deck, starting a sizable fire in the ready-use 4 in (100 mm) ammunition store but this fire did not spread to other areas of the ship or cause the later explosion. It is possible that ''Hood'' was struck again at the base of her bridge and in her foretop radar director. There has been contention over which German vessel struck ''Hood''; ''Prinz Eugen'' (''Kapitän zur See'' Helmuth Brinkmann), was firing ''Prince of Wales'', following an order from the fleet commander.<sup>[19]</sup> The Gunnery Officer of ''Prinz Eugen'', Paul Schmalenbach is quoted as saying that ''Prinz Eugen'''s target was ''Hood''.<sup>[20]</sup> |
||
| + | The '''Saitama Gettō''' was originally occupied by a resistance group known as the [[Yamato Alliance]], led by a man named Izumi. The area is the site of an ambush in which they are eliminated in a police action by [[Cornelia]]. This location is referred to in the novels as Ōmiya Ghetto (オオミヤゲットー). |
||
| + | {{-}} |
||
| − | === Sinking of ''Hood''[edit] === |
||
| − | A sketch prepared by Captain JC Leach (commanding HMS ''Prince of Wales'') for the 2nd Board of Enquiry, 1941. The sketch represents the column of smoke or flame that erupted from the vicinity of the mainmast immediately before a huge detonation which obliterated the after part of the ship from view. This phenomenon is believed to have been the result of a cordite fire venting through the engine-room ventilators (see article). |
||
| + | ===Shizuoka Ghetto=== |
||
| − | At 06:00, Holland ordered his force to turn once again to port to ensure that the aft main guns on both ''Hood'' and ''Prince of Wales'' could bear on the German ships; during the turn, a salvo from ''Bismarck'', fired from about 9 mi (7.8 nmi; 14 km), was seen by men aboard ''Prince of Wales'' to straddle ''Hood'' abreast her mainmast. It is likely that one 38 cm (15 in) shell struck somewhere between ''Hood''<nowiki/>'s mainmast and "X" turret aft of the mast. A huge pillar of flame that shot upward 'like a giant blowtorch,' in the vicinity of the mainmast, followed by an explosion that destroyed a large portion of the ship from amidships clear to the rear of "Y" turret, blowing both after turrets into the sea. The ship broke in two and the stern fell away and sank. Ted Briggs, one of the survivors, claimed ''Hood'' heeled to 30 degrees at which point 'we knew she just wasn't coming back'. The bow rose clear of the water, pointed upward, pivoted about and sank shortly after the stern. "A" turret fired a salvo while in this upright position, possibly from the doomed gun crew, just before the bow section sank.<sup>[nb 4]</sup> Splinters rained down on ''Prince of Wales'' .5 mi (0.43 nmi; 0.80 km) away. ''Hood'' sank in about three minutes with 1,415 members of the crew. Only Ted Briggs, Bob Tilburn and Bill Dundas survived to be rescued two hours later by the destroyer HMS ''Electra''. |
||
| + | The '''Shizuoka Ghetto''' is an uninhabited seaside region that served as the second attempted founding point of the Special Administrative Zone of Japan under the colonial administration of [[Nunnally vi Britannia]]. It is also the site where the [[Black Knights]]' mass-exile came into legal effect. |
||
| + | {{-}} |
||
| − | The Admiralty later concluded that the most likely explanation for the loss of ''Hood'' was a penetration of her magazines by a 38 cm (15 in) shell from ''Bismarck'', causing the explosion. Recent research with submersible craft suggests that the initial explosion was in the aft 4 in (100 mm) magazine and that it spread to the 15 in (380 mm) magazines via the ammunition trunks. It has been suggested from examination of the wreckage, found in 2001, that the magazine explosion in the 4 in (100 mm) armament near the mainmast caused the vertical blast of flame seen there, and this in turn ignited the magazines of the aft 15 in (380 mm) guns that caused the explosion that wrecked the stern. This explosion might have travelled through the starboard fuel tanks, igniting the fuel oil there, setting off the forward magazines and completing the destruction of the ship. |
||
| + | ===Special Administrative Zone of Japan=== |
||
| − | A photo probably taken from the ''Prinz Eugen'' shows the ''Hood'' exploding in the far distance with the ''Prince of Wales'' nearby |
||
| + | [[Image:Special Administrative Zone of Japan.jpg|thumb|200px|right|Sector F-208 as the first Special Administrative Zone of Japan.]] |
||
| + | The '''Special Administrative Zone of Japan (Gyousei Tokku Nippon)''' is a conceptual Britannian puppet state where Elevens are in name reverted as "citizens of Japan" and restored a number of rights and privileges denied to them as colonial subjects. It was originally to be situated in '''Sector F-208'''. The location is adjacent to the base of Mt. Fuji. Its foundation was proposed and attempted by both Sub-Viceroy [[Euphemia li Britannia]] and Viceroy [[Nunnally vi Britannia]], but neither instance was met with success. Euphemia's attempt ended in a bloody massacre followed by open rebellion, while Nunnally's attempt saw all one million participants exiled. |
||
| + | ===Tokyo Settlement=== |
||
| − | The wreck of ''Hood'' revealed the bow section bereft of any structure. A huge section of her side is missing, from the 'A' barbette to the foredeck. The midship section had its plates curled outward. Moreover, the main parts of the forward structure, including the 600 long tons (610 t) conning tower, were found about 1.1 km (0.59 nmi; 0.68 mi) away from the main wreckage.<sup>[21]</sup> This has sparked theories that the 15 in (380 mm) forward magazines exploded as a result of the force, flames and pressure, caused by the detonation of the aft magazines.<sup>[22]</sup> However, a team of marine forensic scientists has found that implosion damage to the forward hull due to the rapid sinking of the ''Hood'', is the most likely cause of the state of the forward hull, and they do not support any theory that the forward magazines exploded.<sup>[23]</sup> |
||
| + | [[Image:Tokyo Concession.jpg|thumb|200px|right|Tokyo Settlement overlooking Mt. Fuji.]] |
||
| + | The '''Tokyo Settlement (Toukyou Sokai),''' is the administrative capital of Area 11, as well as the setting of the majority of the first season. It occupies a fraction of the area of real-world Tokyo. Dividing the concession area from the ghettos that surround it is the '''5th Circinate Line''' of its monorail system, which takes the place of the former Yamanote Line. Militarily, its forces are organized into defense circles radiating from the '''[[Viceroy's Palace]]'''. The third such line from the center is called the '''Atsugi Line'''. '''[[Ashford Academy]]''' is located on the outskirts of the concession area. So as to provide a regular foundation for ease of construction over the ruins of '''Old Tokyo''', the street level of the concession in fact rests upon a series of interlocked plates, which can be removed in case of earthquakes or other disasters. The locking mechanism is controlled via a closed-circuit system from a city administration facility. Lelouch twice exploits this in his battles against the Britannian army: first during the [[Assault on Tokyo Settlement|battle of Tokyo in 2017]], where he causes the top portion of the entire structure to collapse, destroying much of Cornelia's army; and again a year later to dump a small contingent of Britannian forces onto Chinese consulate soil. After the [[Second Assault on Tokyo Settlement]] a majority of the concession area is obliterated by Nina Einstein's [[F.L.E.I.J.A.]] bomb. In the ensuing chaos, the settlement's operation has been hindered with the infrastructure effectively in shambles. A month after the battle, reconstruction work is underway. |
||
| + | {{-}} |
||
| − | === ''Prince of Wales'' alone[edit] === |
||
| − | ''Prince of Wales'' found herself steering towards the sinking ''Hood''. Her commanding officer, Captain Leach, ordered an emergency avoidance turn away from ''Hood''<nowiki/>'s wreckage. This violent change of course disrupted her aim and put her in a position that made it easier for the Germans to target her. She resumed her previous course, but was now under the concentrated fire of both German ships. ''Prince of Wales''was struck four times by ''Bismarck'' and three times by ''Prinz Eugen''. One shell passed through her upper superstructure, killing or wounding several crewmen in the Compass Platform and Air Defence Platform. Pieces of another shell struck her radar office aft, killing the crewmen within. A 20.3 cm (8.0 in) shell from ''Prinz Eugen'' found its way to the propelling charge/round manipulation chamber below the aft 5.25 in (133 mm) gun turrets, and a 38 cm (15 in) shell from ''Bismarck'' hit underwater below the armour belt, penetrating about 13 ft (4.0 m) into the ship's hull, about 25 ft (7.6 m) below the waterline, but was stopped by the anti-torpedo bulkhead. Fortunately for ''Prince of Wales'', neither shell exploded, but she still suffered minor flooding and the loss of some fuel oil. Contrary to some mistaken opinion, the 38 cm (15 in) shell that struck ''Prince of Wales'' below the waterline did not endanger her magazines, as it came to rest abreast an auxiliary machinery room.<sup>[24]</sup> |
||
| + | [[File:Viceroy_Palace.jpg|thumb]] |
||
| − | The original gunnery plot of HMS ''Prince of Wales'' for the battle of the Denmark Strait (click to enlarge). This shows the ranges and bearings of the 18 salvos fired by ''Prince of Wales''under director fire control between 05:53 and 06:02. Three salvos fired by "Y" turret under local control are not shown. The track of ''Bismarck'' (in red) is a post-battle estimate. |
||
| + | ====Viceroy's Palace/ Government Borough==== |
||
| − | By this time, serious gunnery malfunctions had caused intermittent problems with the main armament, leading to a 26% reduction in output.<sup>[nb 5][nb 6]</sup> According to Captain Leach, he decided that continuing the action would risk losing ''Prince of Wales'' without inflicting further damage on the enemy. He therefore ordered the ship to make smoke and withdraw, 'pending a more favourable opportunity'.<sup>[25]</sup> ''Prince of Wales'' turned away just after 06:04, firing from her rear turret under local control until the turret suffered a jammed shell ring,<sup>[nb 7]</sup> cutting off the ammunition supply and making the guns inoperable. Despite efforts by crew members and civilian technicians to repair the shell ring, all four guns were not back in service until 08:25, although two of the four guns were serviceable by 07:20.<sup>[13]</sup> This temporarily left only five<sup>[26][27][nb 8]</sup> 14 in (360 mm) guns operational, but nine of the ten were operational in five hours.<sup>[28]</sup> The final salvos fired were ragged and are believed to have fallen short.<sup>[29]</sup> The ship retired from the battle around 06:10. Thirteen of her crew had been killed, nine were wounded.<sup>[30]</sup> The timing of ''Prince of Wales''<nowiki/>' withdrawal was fortunate for her, as she had come into torpedo range of ''Prinz Eugen'' and turned away as the German cruiser was about to fire.<sup>[31]</sup> |
||
| + | The '''Viceroy's Palace''' is the center of government for Area 11. The Viceroy and Sub Viceroys offices are located here and these buildings are filled with conference rooms and the like. The Viceroy's Palace is the actual home of the Viceroy and its design is very close to an actual castle, complete with a rooftop villa designed and built by Clovis. The palace is furnished lavishly, and notably contains the throne room for the viceroy and is where viceroys holds parties. All defense circles for the city radiate out from the Viceroy's Palace. |
||
| + | {{-}} |
||
| − | === Breaking off the action[edit] === |
||
| − | On ''Bismarck'', there was tremendous elation at the sinking of ''Hood''. There was also a keen expectation that they would close on ''Prince of Wales'' and possibly finish her off. ''Bismarck''<nowiki/>'s captain, Ernst Lindemann, requested that Admiral Lütjens allow ''Bismarck'' to do just that. Even if British Admiral John Tovey's squadron had left Scapa Flow the previous day, he would still be more than 300 nmi (350 mi; 560 km) away from ''Bismarck'' — even if ''Bismarck'' diverted to sink ''Prince of Wales'' (a chase Lindemann calculated would take only two or three hours).<sup>[32]</sup>Lütjens refused to allow Lindemann to give chase, giving no explanation. Lindemann repeated his request, this time more assertively.<sup>[33]</sup>Lütjens held firm orders from the German Naval Commander, ''Groß Admiral'' Erich Raeder, to avoid unnecessary combat with the Royal Navy, especially when it could lead to further damage that could hasten delivering ''Bismarck'' toward the waiting hands of the British. He broke off combat instead of pursuing ''Prince of Wales''<sup>[1]</sup> and ordered a course of 270°, due west.<sup>[33]</sup> ''Bismarck'' had fired 93 of her 353 base-fused Armour Piercing (AP) shells during the engagement.<sup>[34]</sup> |
||
| + | ====Ashford Academy==== |
||
| − | This clash between the two senior German officers reflected their disparate and distinct command functions. As commander of ''Bismarck'', Lindemann operated first and foremost as a tactician. As such, he had no doubt that his ship's immediate objective was to destroy ''Prince of Wales'', and he had pressed his case as far and hard as he should. Lütjens, as fleet chief and task force commander, operated at the strategic and operational levels. To some degree, his orders were clear – attacking convoys was his priority, not risking "a major engagement for limited, and perhaps uncertain, goals". Nevertheless, Raeder had also ordered Lütjens to be bold and imaginative, to accept battle if unavoidable and conduct it vigorously to the finish.<sup>[35]</sup> |
||
| + | {{main|Ashford Academy}} |
||
| + | ====Babel Tower==== |
||
| − | The reality was that Lütjens' orders did not cover a spectacular success like the one just achieved. His priority therefore was to stick to his instructions - to concentrate on sinking merchant shipping and avoid encounters with enemy warships whenever possible.<sup>[36]</sup> Moreover, before leaving Germany, Lütjens had told Admirals Conrad Patzig and Wilhelm Marschall, that he would adhere to Raeder's directives. This meant he did not intend to become the third fleet chief to be relieved for contradicting Raeder's orders; Marschall, one of his two predecessors, had been relieved of command for not following his orders to the letter despite the fact that Marschall's analysis of the changes in the tactical situation since the orders were issued resulted in the sinking of the British aircraft carrier HMS ''Glorious'' and its two escorting destroyers. Nor was he predisposed to discuss his command decisions with a subordinate officer.<sup>[35]</sup> |
||
| + | [[Image:Babel Tower.JPG|200px|right|thumb|Babel Tower]] |
||
| + | '''Babel Tower''' is one of the series commercial complexes on the outskirts of the [[Tokyo Settlement]], administrated by organized criminal elements as a casino wherein human trade and other illegal practices are rampant. [[Lelouch]] recovers his memories inside the building, then directs the [[Black Knights]] to destroy it, simultaneously killing Viceroy Calares and making a direct path to the [[Chinese Consulate]]. |
||
| + | {{-}} |
||
| − | Even if he had known it was the untried ''Prince of Wales'' he was fighting and not ''King George V'', Lütjens would probably have stuck to his decision. Following her would have meant exposing the squadron to further gunfire as well as to torpedo attacks from ''Norfolk'' and ''Suffolk''. He would have risked his ships and crews on an expressly forbidden opportunity.<sup>[36]</sup> |
||
| + | ====Chinese Consulate==== |
||
| − | Between 06:19 and 06:25, ''Suffolk'' fired six salvoes in the direction of ''Bismarck'', having mistaken a radar contact with an aircraft for ''Bismarck''. ''Suffolk'' was actually out of gun range of both ''Bismarck'' and ''Prinz Eugen'' at the time.<sup>[37]</sup>[[Category:Nations]] |
||
| + | [[Image:Chinese Consulate.JPG|200px|right|thumb|Chinese Consulate]] |
||
| + | The '''Chinese Consulate''' is an area in Tokyo Concession that belongs to the [[Chinese Federation]]. The consulate serves as a residence for representatives of the Chinese Federation who conduct foreign relations with the local government of Area 11. After the [[Black Knights]] escaped from the ruins of [[Babel Tower]], they were given asylum by [[High Eunuchs|High Eunuch Gao Hai]] under the influence of [[Lelouch]]'s [[Geass]]. Because of its nature as a consulate, the Blacks Knights received diplomatic immunity whilst inside the consulate, preventing the [[Britannia]]n government from apprehending them, lest they incite an international incident. |
||
| + | |||
| + | {{-}} |
||
| + | |||
| + | ====Clovisland==== |
||
| + | [[Image:Clovisland.jpg|right|200px|thumb|Clovisland]] |
||
| + | '''Clovisland''' is a theme park near the Tokyo Concession. It was the stage of one of the confrontations between [[Mao]] and [[Lelouch]]. According to [[Sayoko]]'s diary, the park is rumored to be jinxed such that couples who go on a date there are fated to break up. The origin of this rumor appears to be linked with [[Milly Ashford|Milly]]'s habit of using the park to make her potential fiancés upset. In Suzaku of the Counterattack, Elle takes Suzaku there on their ''date.'' |
||
| + | |||
| + | {{-}} |
||
| + | |||
| + | ====Clovis Memorial Museum==== |
||
| + | [[File:Clovis Memorial Museum of Art.png|thumb|200px|right|Clovis Memorial Museum.]] |
||
| + | The '''Clovis Memorial Museum''' in Area 11 was opened in commemoration of [[Clovis]], who was known to be a patron of the fine arts. [[Euphemia]] announced the knighting of [[Suzaku]] during the museum's dedication and later it was been burned down by the Britannian military ordered by Lelouch as the new emperor after he murdered his own father. |
||
| + | |||
| + | {{-}} |
||
| + | |||
| + | ====Old Tokyo Tower==== |
||
| + | [[Image:Old Tokyo Tower.png|thumb|200px|right|Old Tokyo Tower.]] |
||
| + | The damaged '''Old Tokyo Tower''' has been converted into the '''Britannian Victory Memorial Center''', a museum commemorating the Britannian victory during the occupation of Area 11. It was the location that [[Lelouch]] directed [[Ohgi]]'s resistance group to visit prior to requesting their aid in the formation of the [[Black Knights]]. |
||
| + | |||
| + | {{-}} |
||
| + | |||
| + | ====Omotesandō Mall==== |
||
| + | [[File:Omotesandō Mall.JPG|thumb|200px|The Omotesandō Mall]] |
||
| + | The '''Omotesandō Mall''' is situated in a famous shopping district of the [[Tokyo Concession]]. It was the site of a false terrorist incident orchestrated by [[Lelouch]] to mislead the Secret Intelligence Service agents tailing him during a shopping excursion with [[Shirley]]. '''Pizza Hut''', '''BIGLOBE''', and '''SoftRola''' have shops here. |
||
| + | |||
| + | {{-}} |
||
| + | |||
| + | ====Port Yokosuka==== |
||
| + | [[File:Port Yokosuka.png|thumb|right|220px|Port Yokosuka]] |
||
| + | '''Port Yokosuka''' is a major seaport situated south of the Tokyo Concession. This was the location of the final encounter between the [[Japanese Liberation Front]] and the [[Holy Britannian Empire]]. After Zero's return in 2018, the Black Knights' submarine was kept here for a short period of time, concealed within a tanker. |
||
| + | |||
| + | {{-}} |
||
| + | |||
| + | ====Shinjuku Ghetto/ Shinjuku Redevelopment Zone==== |
||
| + | [[File:Shinjuku Redevelopment Zone.JPG|thumb|200px|Shinjuku Redevelopment Zone]] |
||
| + | |||
| + | |||
| + | The '''Shinjuku Ghetto''' is a region bordering the Tokyo Concession left untouched by the [http://codegeass.wikia.com/wiki/Area_11 Area 11] colonial government. The buildings within were heavily damaged during the combative phase of the [http://codegeass.wikia.com/wiki/Britannian Britannian] occupation, and due to sanctions imposed by the subsequent colonial government, rebuilding efforts have thus far yielded only temporary structures that house the [http://codegeass.wikia.com/wiki/Elevens Elevens] who did not take the Honorary Britannian status or the homeless/unemployed, they inhabit the area. |
||
| + | |||
| + | Sometime later, after the first Black Rebellion, the Shinjuku Ghetto became a construction zone within designated as Shinjuku Redevelopment Zone separated by different blocks. Expansion of the Tokyo Settlement was part of the plan to elevate Area 11 from a reformation status to a satellite status. Block Five is the location where [http://codegeass.wikia.com/wiki/Lelouch_Lamperouge Lelouch Lamperouge] initially formed his [http://codegeass.wikia.com/wiki/Geass Geass] contract with [http://codegeass.wikia.com/wiki/C.C. C.C.]. |
||
| + | |||
| + | {{-}} |
||
| + | [[Category:Nations]] |
||
[[Category:United States of Japan]] |
[[Category:United States of Japan]] |
||
[[Category:United Federation of Nations]] |
[[Category:United Federation of Nations]] |
||
Latest revision as of 21:04, 17 July 2019
 Flag | |
| Japan | |
|---|---|
| Type | Unitary Parliamentary Democracy |
| Prime Minister | Genbu Kururugi (Former) Kaname Ohgi (Current) Kaguya Sumeragi (Manga Only) |
| Information | |
| Capital | Tokyo Settlement |
| Population | 89 million (prior to invasion) |
| Real World Countries | |
| Japan | |
| Other Information | |
| See United Federation of Nations | |
The United States of Japan, known as Area 11 during Britannian rule and formerly known as Japan, serves as the primary setting of Code Geass media. Presumably, most of Japan's history in the world of Code Geass diverges little from that of our world.
History
Former Kururugi Administration.
Prior to its invasion and conquest by the Holy Britannian Empire, Japan used the real-world Hinomaru flag and operated under a system of parliament, having become a democracy after the First Pacific War.
Japan was the world's largest supplier of Sakuradite, a rare mineral which was highly valued as a superconductor. Producing 70% of it worldwide, Japan used this resource to manipulate the balance of power between the three dominant powers to remain an independent and neutral nation. It was believed that if any of the superpowers invaded Japan for its Sakuradite, the other two would be forced to attack on Japan's behalf or otherwise risk annihilation. During what became known as the Oriental Incident, Japan aligned its policies with the Chinese Federation and Europa United against Britannia as Britannia continued to make increasingly aggressive advances in the Pacific theater.
On August 10 in the year 2010 of the Imperial Calendar, the Second Pacific War erupted and Britannia easily overwhelmed Japan's comparatively outdated defenses with their new humanoid autonomous armored knights known as the Knightmare Frames in only a month. Following its conquest, Japan was renamed "Area 11" and its people "Elevens." Britannia quickly began building colonies and mines on the islands, recruiting former Japanese as "Honorary Britannians" while those who refused to join Britannia lived in poverty in the ghettos or joined the various resistance movements. Though Japan was defeated, it wasn't broken as Japan's government surrendered before the Japanese military had been fully destroyed, leading to the creation of the Japanese Liberation Front and other resistance movements that persisted for years, culminating in the Black Knights.
The resistance of Japan, which Lelouch mentions is stronger than in any other part of the empire, owes its presence in part to the sudden death of Genbu Kururugi, Japan's last prime minister before it was conquered. The official statement announced that the prime minister committed suicide in the face of Britannia's overwhelming forces, when, in actuality, he was prepared to stage a do-or-die resistance against Britannia, even if it meant the extinction of the Japanese people. This compelled his son, Suzaku Kururugi, to murder him in the hopes that fewer lives would be lost.
Britannian Occupation and Formation of United States of Japan
Following the failed First Black Rebellion, Area 11 was designated a "correctional area," and particularly heavy penalties were placed upon Elevens as punishment for their role in the uprising, though even one year later, they still held to hope. Before Zero returned, resistance was active only to heighten oppression during Glinda Knights' occupation in Area 11 when the Black Knights launched their attack on Ashford Academy. When Zero finally returned, he declared the creation of the "United States of Japan" and used deception to evacuate one million Japanese, all of them members of the Black Knights, to Horai Island, an artificial island granted to them by the Chinese Federation and worked towards reconquering Japan.
Following the Second Black Rebellion, the Black Knights conducted negotiations with Prince Schneizel, liberating Area 11 in exchange for betraying Zero, who was exposed as Lelouch. After this, Area 11 reclaimed its old name as Japan, and, following Lelouch's death, Kaname Ohgi became the new prime minister of the United States of Japan.
Social Structure During Britannian Control
One of the distinctions between the Settlement and the Ghetto.
Upon completion of the invasion, Japan was renamed Area 11, and its population was split into Elevens, Honorary Britannians, and Britannians. Britannians and Honorary Britannians, supposedly, receive better treatment, special privileges and live in developed areas of Tokyo Settlement, while the underprivileged Elevens (Japanese people) live in the ghettos, such as Shinjuku Ghetto, ruins of old Tokyo.
Many Japanese take the term "Elevens" as being extremely offensive, even reacting violently towards Britannians who use the term; though there are exceptions, as seen in episode "The Abandoned Mask" where few Japanese grunts, working for a Britannian drug dealer, preferred to be called Elevens and had possibly seen it as a compliment.
This system is abolished and their demonym is restored to "Japanese" after their independence.
Viceroys and Sub Viceroys
Throughout the Series, several people (usually of Royalty) have been acting as Viceroys over area 11, as a Viceroy, they hold supreme power over the Area. The position of Sub-Viceroy, despite its connection to the Viceroy, is a ceremonial position with no authority that Cornelia devised to keep Euphemia close. As with most colonies, the currency of Area 11 has the face of its viceroy.

Prince Clovis on Currency
List of Viceroys of Area 11
- Prince Clovis la Britannia (Deceased; Assassinated by Zero).
- Princess Cornelia li Britannia (Resigned)
- Euphemia li Britannia, as Sub-Viceroy. (Deceased; Assassinated by Zero).
- Calares (Deceased; Assassinated by Zero).
- Princess Nunnally vi Britannia (Became 100th Empress).
Notable Locations
Fuji Administrative District

Mt. Fuji.
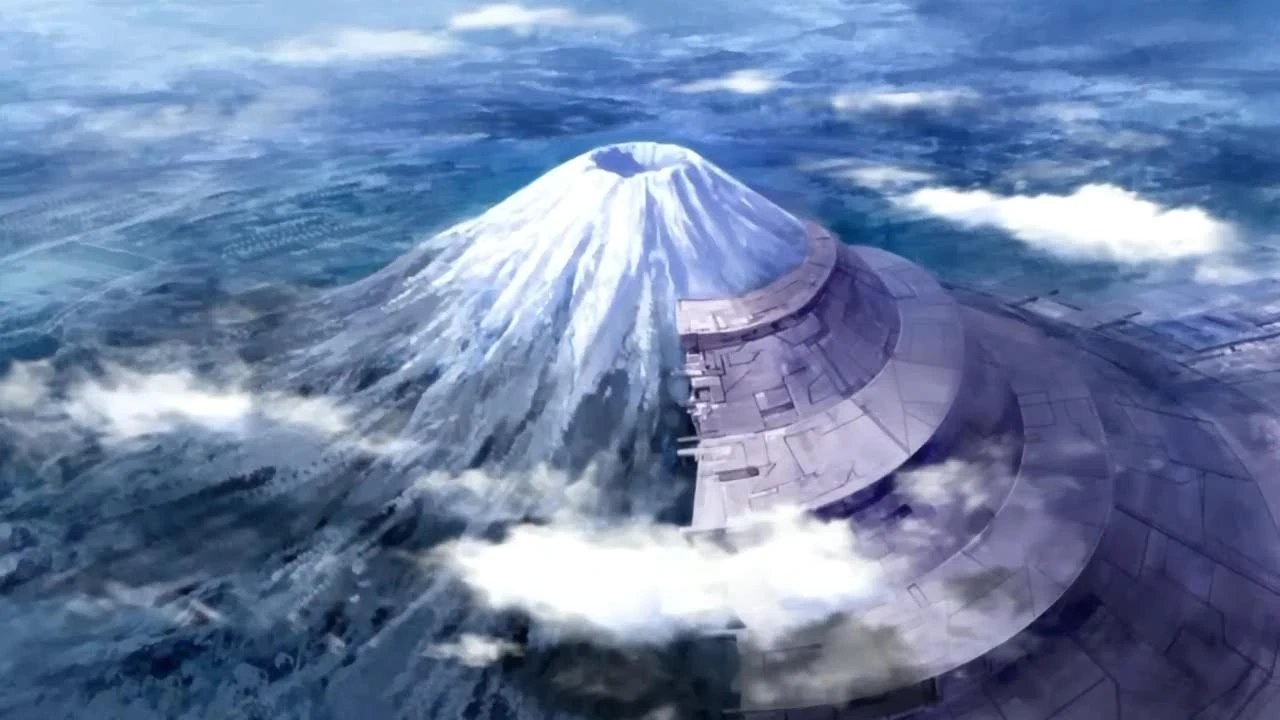
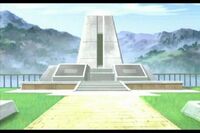
The Fuji Administrative District is the site of a major Sakuradite mining operation carried out under the direct authority of the NAC. In 2017, it was the setting of the first proposed Special Administrative Zone of Japan and the massacre that ensued during the founding ceremony. A memorial called the Fuji Mausoleum was built on site in the year following, commemorating those who died. The location is also known as Sector F-208. During a battle between Lelouch and Schneizel, Lelouch detonated the Sakuradite mines within Mt. Fuji, causing an explosion that destroyed a majority of the Black Knights' forces as well as his own ground forces.
Kamine Island

thumb
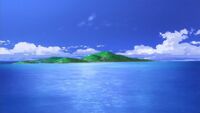
Kamine Island (神根島, "Kaminejima") is an uninhabited island in Area 11, near the real-world island of Shikinejima, claimed by Clovis prior to his death. It is a few miles from Shikine Island. A Thought Elevator is located here within the ruins of a structure built by an as yet unidentified civilization. This civilization appears to be somehow related to the origin of C.C. and V.V., and the existence of Geass. In 2018, after connecting all the Thought Elevators, the Emperor of Britannia intends to unleash Ragnarök using the Thought Elevator located there.
Shikine Island
Shikine Island Base
Shikine Island (Shikinejima) is the site of a Britannian military facility, which hosts the airstrip used by Prince Schneizel El Britannia's Avalon upon its initial arrival in Area 11. This was originally the site of a meeting between Princess Euphemia Li Britannia and a V.I.P. (who is later revealed to be Schneizel), however this was interrupted due to an attack by the Black Knights. The commander of the facility is Lieutenant Colonel Fayer (ファイエル中佐).
Kyushu Block
Lake Kawaguchi

Lake Kawaguchi Convention Centre hotel
Lake Kawaguchi is a famous Britannian tourist spot, and is the site of the Annual Summit of the Sakuradite Producing Countries. It is the setting of a hostage incident instigated by a branch of the Japan Liberation Front under the leadership of a man named Josui Kusakabe. The incident is resolved by the combined efforts of Cornelia and the Black Knights.
Narita
Narita Memorial.
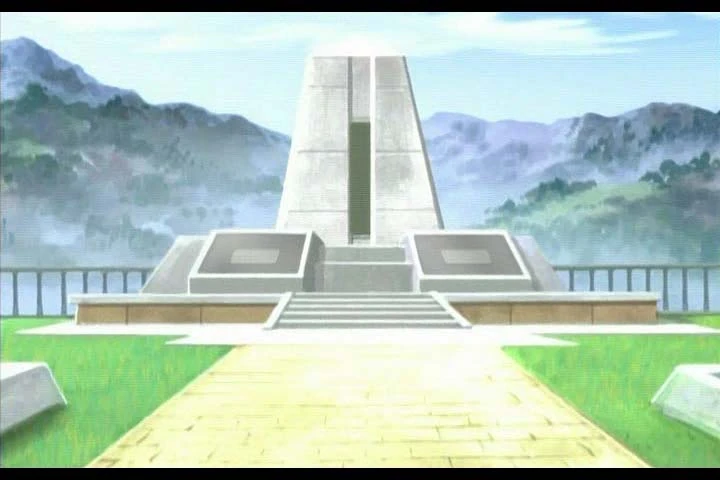
The Narita Mountains are a mountainous region originally occupied by the Japan Liberation Front as a major base. It is the site of an armed skirmish between Cornelia and the Front, interrupted by the Black Knights soil liquefying the mountainside with disturbed groundwater. The resulting landslide wipes out a fair portion of both Cornelia's forces and the Front's, and also damages the small settlement of Narita downhill, killing many civilians. Among the dead is Shirley's father, Joseph Fenette, a Britannian public official who was surveying the region for veins of Sakuradite; in the novels, he is said to be an associate of General Bartley. A memorial to the Britannian citizens who lost their lives in the incident was later built in the area. One of the laboratories of the Rosenberg Institute used by Bartley to research C.C. was situated in the town until the above events forced a relocation. Neither the settlement nor the mountain range by the same name bear any relationship with the actual Narita City.


The Narita Mountains.
Saitama Ghetto
The Saitama Gettō was originally occupied by a resistance group known as the Yamato Alliance, led by a man named Izumi. The area is the site of an ambush in which they are eliminated in a police action by Cornelia. This location is referred to in the novels as Ōmiya Ghetto (オオミヤゲットー).
Shizuoka Ghetto
The Shizuoka Ghetto is an uninhabited seaside region that served as the second attempted founding point of the Special Administrative Zone of Japan under the colonial administration of Nunnally vi Britannia. It is also the site where the Black Knights' mass-exile came into legal effect.
Special Administrative Zone of Japan

Sector F-208 as the first Special Administrative Zone of Japan.
The Special Administrative Zone of Japan (Gyousei Tokku Nippon) is a conceptual Britannian puppet state where Elevens are in name reverted as "citizens of Japan" and restored a number of rights and privileges denied to them as colonial subjects. It was originally to be situated in Sector F-208. The location is adjacent to the base of Mt. Fuji. Its foundation was proposed and attempted by both Sub-Viceroy Euphemia li Britannia and Viceroy Nunnally vi Britannia, but neither instance was met with success. Euphemia's attempt ended in a bloody massacre followed by open rebellion, while Nunnally's attempt saw all one million participants exiled.
Tokyo Settlement

Tokyo Settlement overlooking Mt. Fuji.
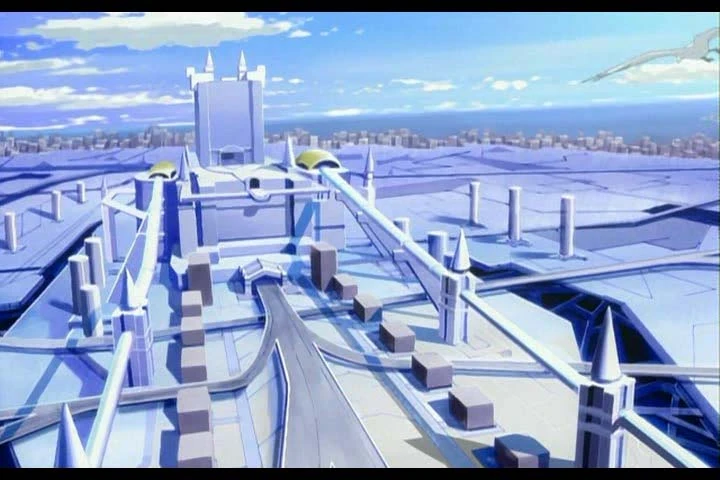
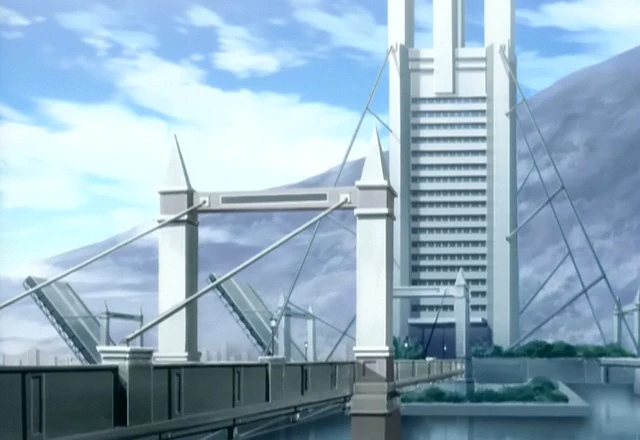
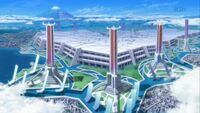
The Tokyo Settlement (Toukyou Sokai), is the administrative capital of Area 11, as well as the setting of the majority of the first season. It occupies a fraction of the area of real-world Tokyo. Dividing the concession area from the ghettos that surround it is the 5th Circinate Line of its monorail system, which takes the place of the former Yamanote Line. Militarily, its forces are organized into defense circles radiating from the Viceroy's Palace. The third such line from the center is called the Atsugi Line. Ashford Academy is located on the outskirts of the concession area. So as to provide a regular foundation for ease of construction over the ruins of Old Tokyo, the street level of the concession in fact rests upon a series of interlocked plates, which can be removed in case of earthquakes or other disasters. The locking mechanism is controlled via a closed-circuit system from a city administration facility. Lelouch twice exploits this in his battles against the Britannian army: first during the battle of Tokyo in 2017, where he causes the top portion of the entire structure to collapse, destroying much of Cornelia's army; and again a year later to dump a small contingent of Britannian forces onto Chinese consulate soil. After the Second Assault on Tokyo Settlement a majority of the concession area is obliterated by Nina Einstein's F.L.E.I.J.A. bomb. In the ensuing chaos, the settlement's operation has been hindered with the infrastructure effectively in shambles. A month after the battle, reconstruction work is underway.
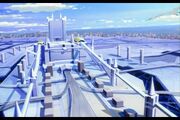
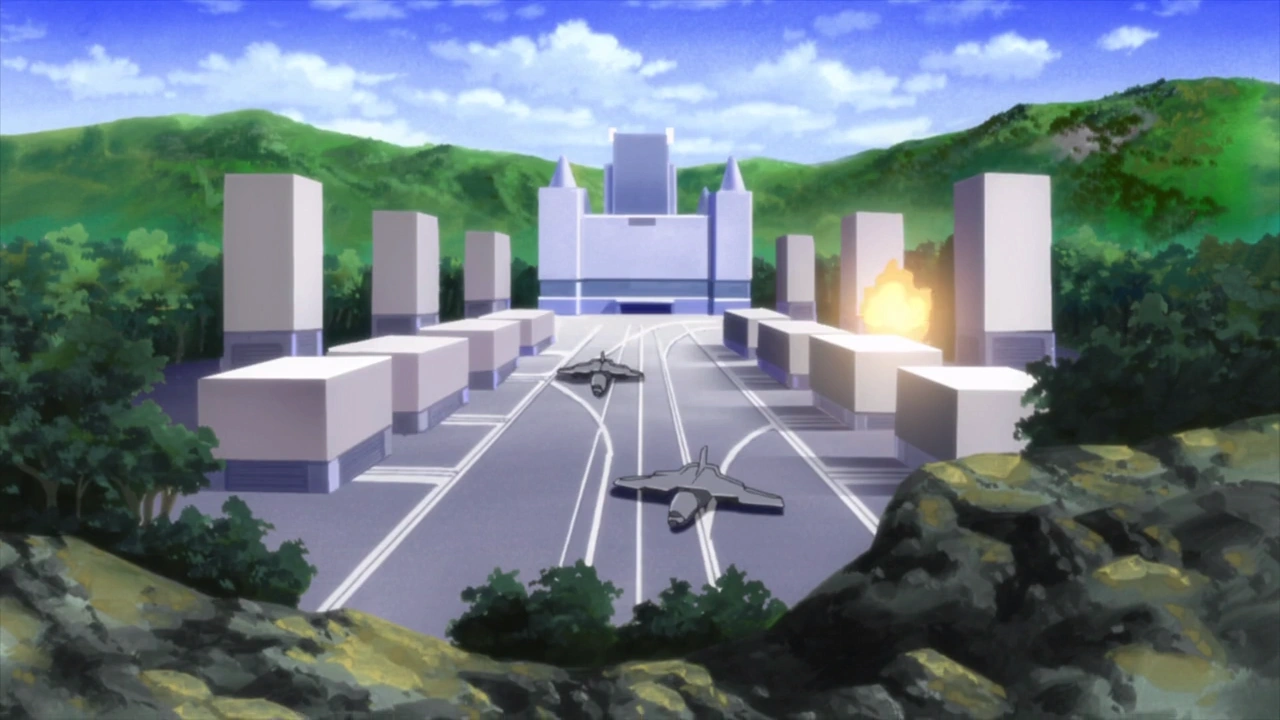
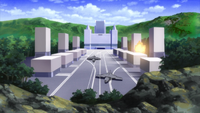
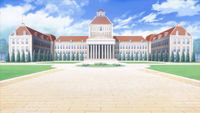
Viceroy's Palace/ Government Borough
The Viceroy's Palace is the center of government for Area 11. The Viceroy and Sub Viceroys offices are located here and these buildings are filled with conference rooms and the like. The Viceroy's Palace is the actual home of the Viceroy and its design is very close to an actual castle, complete with a rooftop villa designed and built by Clovis. The palace is furnished lavishly, and notably contains the throne room for the viceroy and is where viceroys holds parties. All defense circles for the city radiate out from the Viceroy's Palace.
Ashford Academy
Main article: Ashford Academy
Babel Tower
Babel Tower
Babel Tower is one of the series commercial complexes on the outskirts of the Tokyo Settlement, administrated by organized criminal elements as a casino wherein human trade and other illegal practices are rampant. Lelouch recovers his memories inside the building, then directs the Black Knights to destroy it, simultaneously killing Viceroy Calares and making a direct path to the Chinese Consulate.
Chinese Consulate


Chinese Consulate
The Chinese Consulate is an area in Tokyo Concession that belongs to the Chinese Federation. The consulate serves as a residence for representatives of the Chinese Federation who conduct foreign relations with the local government of Area 11. After the Black Knights escaped from the ruins of Babel Tower, they were given asylum by High Eunuch Gao Hai under the influence of Lelouch's Geass. Because of its nature as a consulate, the Blacks Knights received diplomatic immunity whilst inside the consulate, preventing the Britannian government from apprehending them, lest they incite an international incident.
Clovisland

Clovisland
Clovisland is a theme park near the Tokyo Concession. It was the stage of one of the confrontations between Mao and Lelouch. According to Sayoko's diary, the park is rumored to be jinxed such that couples who go on a date there are fated to break up. The origin of this rumor appears to be linked with Milly's habit of using the park to make her potential fiancés upset. In Suzaku of the Counterattack, Elle takes Suzaku there on their date.
Clovis Memorial Museum

Clovis Memorial Museum.
The Clovis Memorial Museum in Area 11 was opened in commemoration of Clovis, who was known to be a patron of the fine arts. Euphemia announced the knighting of Suzaku during the museum's dedication and later it was been burned down by the Britannian military ordered by Lelouch as the new emperor after he murdered his own father.
Old Tokyo Tower

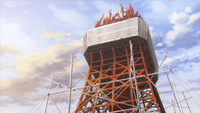
Old Tokyo Tower.
The damaged Old Tokyo Tower has been converted into the Britannian Victory Memorial Center, a museum commemorating the Britannian victory during the occupation of Area 11. It was the location that Lelouch directed Ohgi's resistance group to visit prior to requesting their aid in the formation of the Black Knights.
Omotesandō Mall
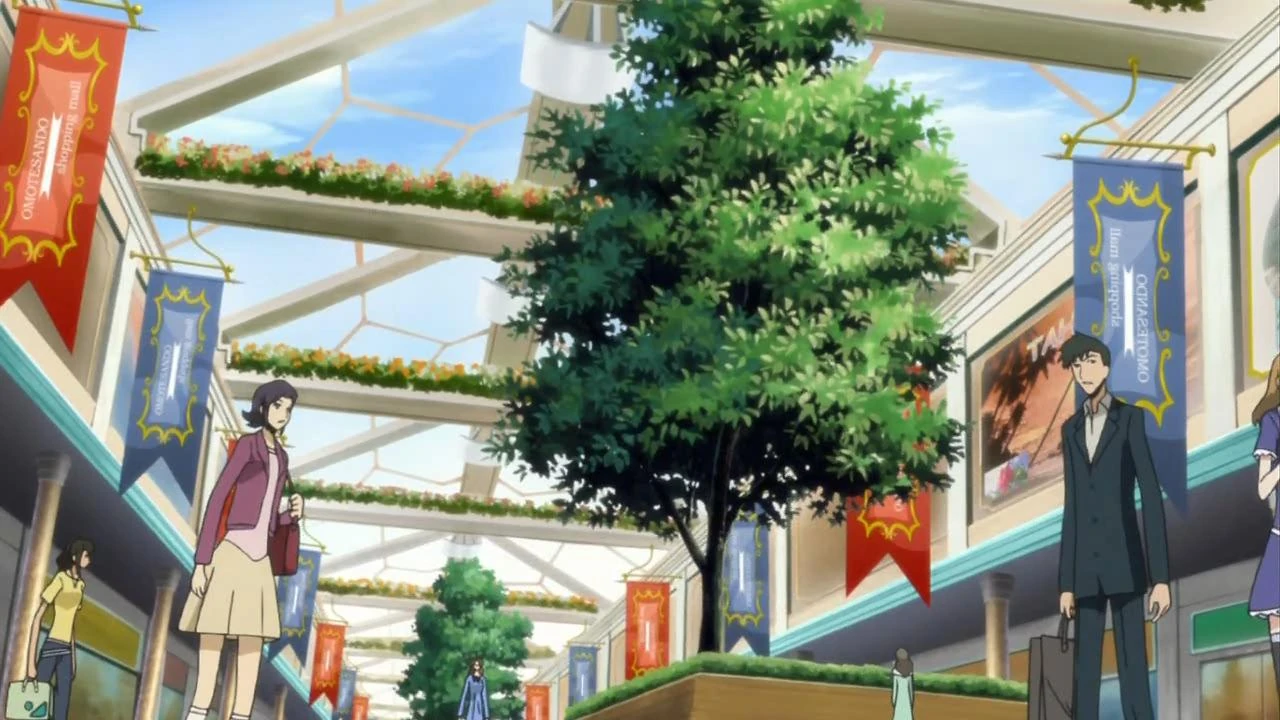
The Omotesandō Mall
The Omotesandō Mall is situated in a famous shopping district of the Tokyo Concession. It was the site of a false terrorist incident orchestrated by Lelouch to mislead the Secret Intelligence Service agents tailing him during a shopping excursion with Shirley. Pizza Hut, BIGLOBE, and SoftRola have shops here.
Port Yokosuka
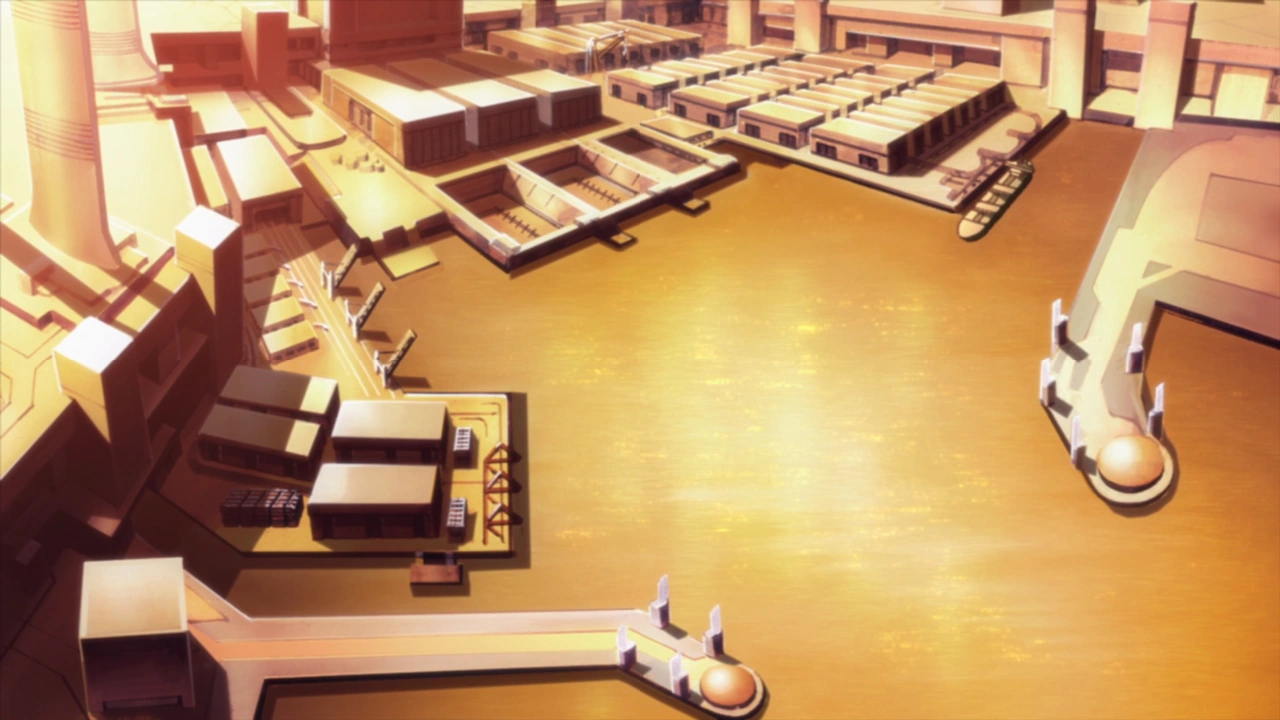
Port Yokosuka
Port Yokosuka is a major seaport situated south of the Tokyo Concession. This was the location of the final encounter between the Japanese Liberation Front and the Holy Britannian Empire. After Zero's return in 2018, the Black Knights' submarine was kept here for a short period of time, concealed within a tanker.
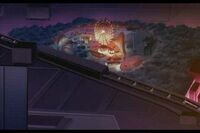
Shinjuku Ghetto/ Shinjuku Redevelopment Zone
Shinjuku Redevelopment Zone
The Shinjuku Ghetto is a region bordering the Tokyo Concession left untouched by the Area 11 colonial government. The buildings within were heavily damaged during the combative phase of the Britannian occupation, and due to sanctions imposed by the subsequent colonial government, rebuilding efforts have thus far yielded only temporary structures that house the Elevens who did not take the Honorary Britannian status or the homeless/unemployed, they inhabit the area.
Sometime later, after the first Black Rebellion, the Shinjuku Ghetto became a construction zone within designated as Shinjuku Redevelopment Zone separated by different blocks. Expansion of the Tokyo Settlement was part of the plan to elevate Area 11 from a reformation status to a satellite status. Block Five is the location where Lelouch Lamperouge initially formed his Geass contract with C.C..